The Raspberry Pi Camera Module is a custom designed add-on for Raspberry Pi. It attaches to Raspberry Pi by way of one of the two small sockets on the board upper surface. This interface uses the dedicated CSI interface, which was designed especially for interfacing to cameras. The CSI bus is capable of extremely high data rates, and it exclusively carries pixel data.
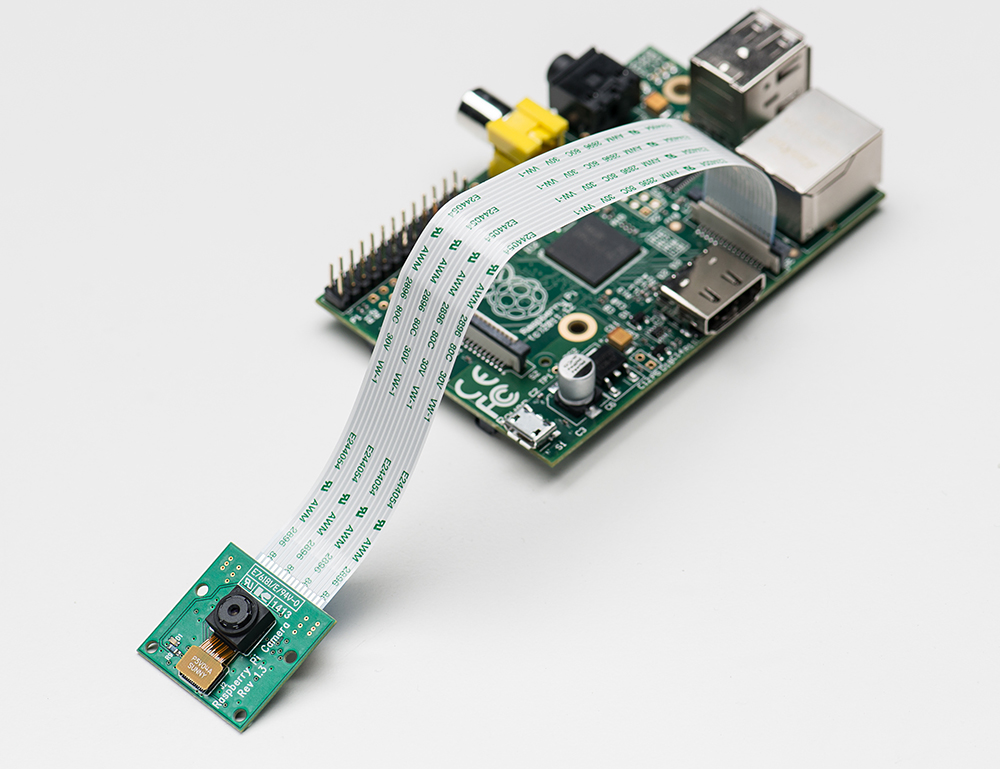 The board itself is tiny, at around 25mm x 20mm x 9mm. It also weighs just over 3g, making it perfect for mobile or other applications where size and weight are important. It connects to Raspberry Pi by way of a short ribbon cable. The camera is connected to the BCM2835 processor on the Pi via the CSI bus, a higher bandwidth link which carries pixel data from the camera back to the processor. This bus travels along the ribbon cable that attaches the camera board to the Pi.
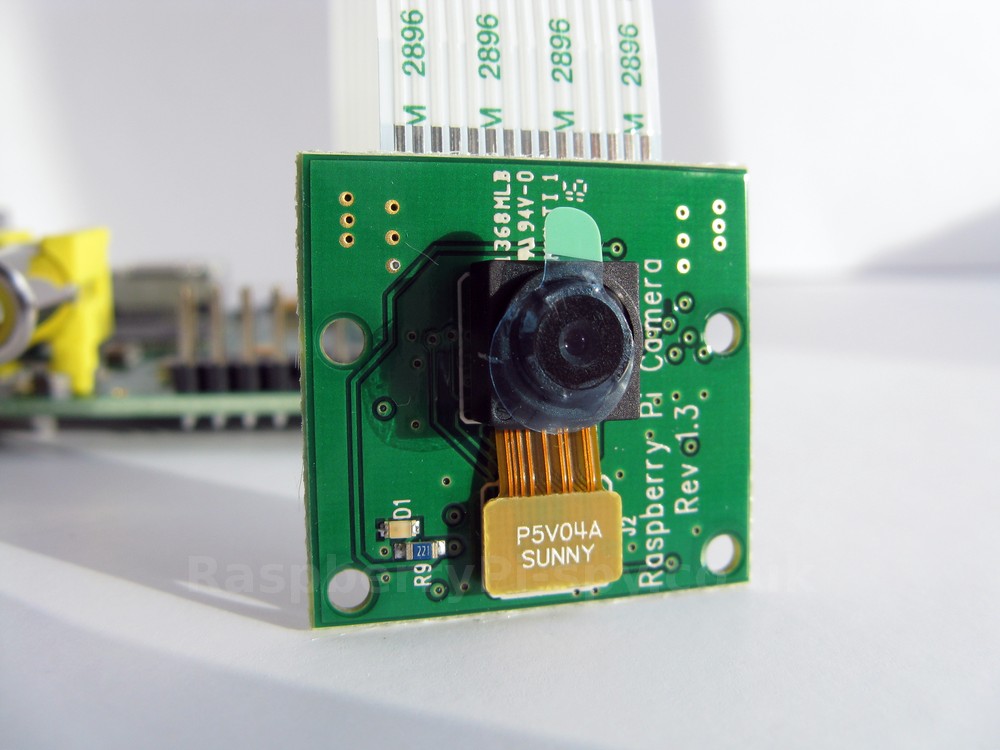
The sensor itself has a native resolution of 5 megapixel, and has a fixed focus lens onboard. In terms of still images, the camera is capable of 2592 x 1944 pixel static images, and also supports 1080p30, 720p60 and 640x480p60/90 video.
The camera is supported in the latest version of Raspbian, Raspberry Pi’s preferred operating system.
Connecting the Camera
Please note that the camera can be damaged by static electricity. Before removing the camera from its grey anti-static bag, please make sure you have discharged yourself by touching an earthed object (e.g. a radiator or water tap).
- The flex cable inserts into the connector situated between the Ethernet and HDMI ports, with the silver connectors facing the HDMI port.
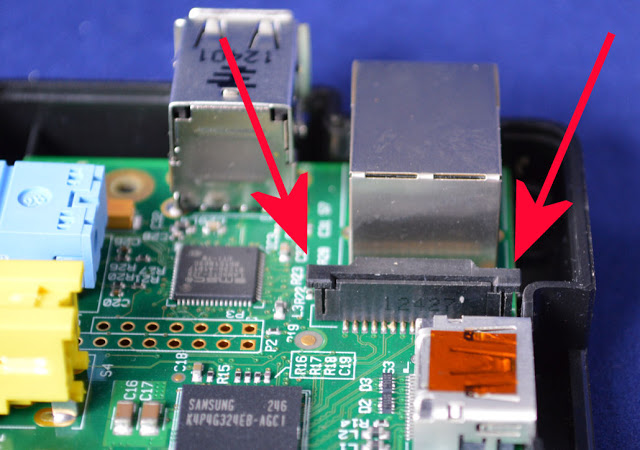
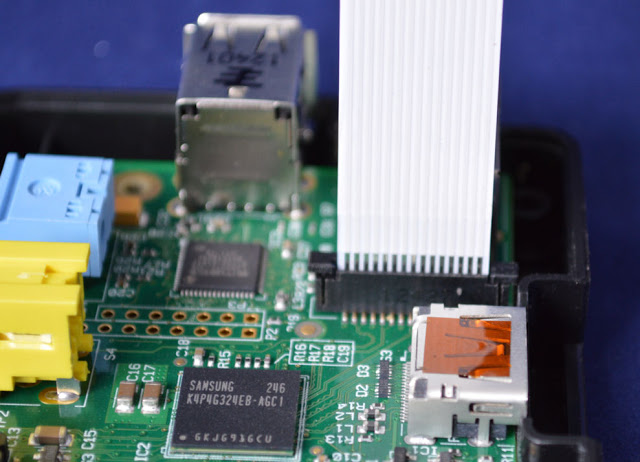
- The flex cable connector should be opened by pulling the tabs on the top of the connector upwards then towards the Ethernet port. The flex cable should be inserted firmly into the connector, with care taken not to bend the flex at too acute an angle.

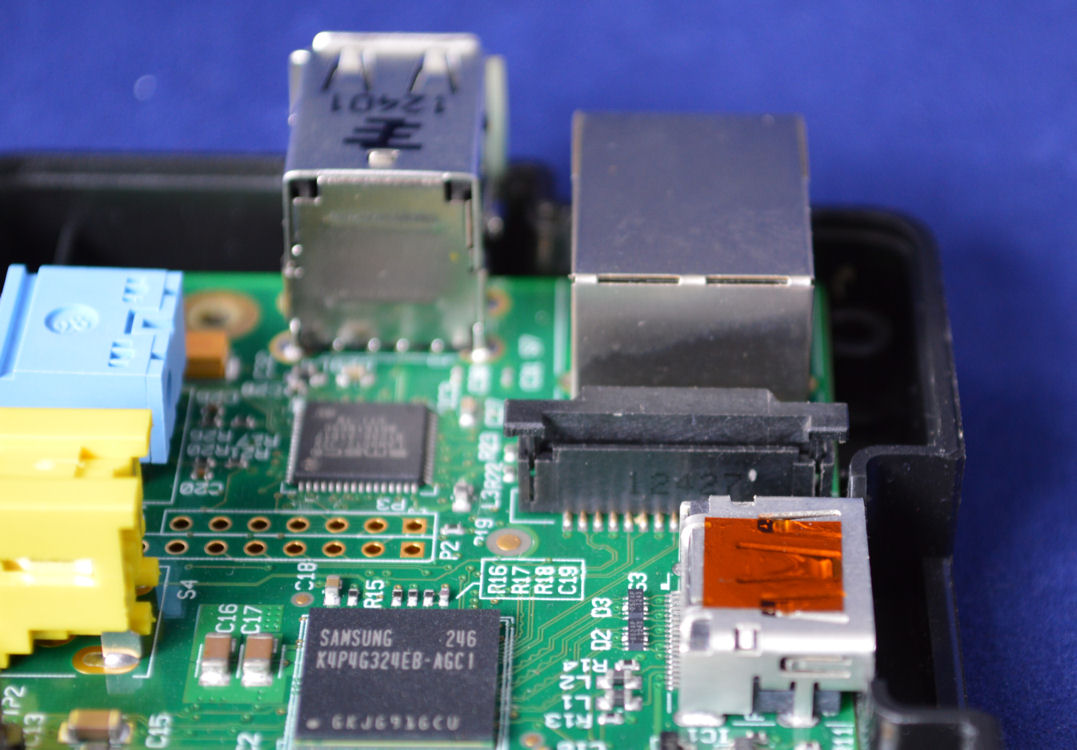
- The top part of the connector should then be pushed towards the HDMI connector and down, while the flex cable is held in place.
- The camera may come with a small piece of translucent plastic film covering the lens. This is only present to protect the lens and needs to be removed by gently peeling it off.
Enabling camera support in Raspbian
Boot up the Pi and log in with the following details:
- The default username is pi
- The default password is raspberry
Run the following commands in a terminal to upgrade the Raspberry Pi firmware to the latest version:
sudo apt-get update
sudo apt-get upgrade
Access the configuration settings for the Pi by running the following command:
sudo raspi-config
Navigate to “camera” and select “enable”.
Select “Finish” and reboot.
Using the Raspberry Pi camera software
raspivid is a command line application that allows you to capture video with the camera module, while the application raspistill allows you to capture images.
-o or –output specifies the output filename and -t or –timeout specifies the amount of time that the preview will be displayed in milliseconds. Note that this set to 5s by default and that raspistill will capture the final frame of the preview period.
-d or –demo runs the demo mode that will cycle through the various image effects that are available.
Example commands
Capture an image in jpeg format:
raspistill -o image.jpg
Capture a 5s video in h264 format:
raspivid -o video.h264
Capture a 10s video:
raspivid -o video.h264 -t 10000
Capture a 10s video in demo mode:
raspivid -o video.h264 -t 10000 -d
To see a list of possible options for running raspivid or raspistill, you can run:
raspivid | less
raspistill | less
Use the arrow keys to scroll and type q to exit.
Extended documentation is available here.
Note that we recommend that you change SSH password if you are using a camera, in order to prevent unwanted access.
Streaming video from the Raspberry Pi camera over a network
Viewing the feed on Linux Ubuntu
Install the dependencies by running the following in a terminal:
sudo apt-get install mplayer netcat
Find your IP address by running ifconfig. (Your IP address will be listed in the console output and will probably be of the form 192.168.1.XXX).
Run the following command in a terminal to view the feed using MPlayer:
nc.traditional -l -p 5001 | mplayer -fps 31 -cache 1024 –
Viewing the feed on a Raspberry Pi
Find your IP address by running ifconfig. (Your IP address will be listed in the console output and will probably be of the form 192.168.1.XXX).
Run the following commands in a terminal on the receiving Pi:
mkfifo buffer
nc -p 5001 -l > buffer | /opt/vc/src/hello_pi/hello_video/hello_video.bin buffer
Transmitting the feed from the Pi with camera module attached
After setting up the “receiving” machine as per the instructions above, run the following commands in a terminal on the “transmitting” Pi:
raspivid -t 999999 -o – | nc.traditional [insert the IP address of the client] 5001
You can then use the commands listed in the “How to use the Raspberry Pi camera software” section above to change the capture time or to add a video effect.
There are a few other third party software that are compatible with the camera. Have fun exploring!
Reference & Further Reading
- http://www.raspberrypi.org/camera
- http://www.raspberrypi.org/wp-content/uploads/2013/07/RaspiCam-Documentation.pdf
- http://asliceofraspberrypi.blogspot.com.au/2013/05/installing-raspberry-pi-camera-module_23.html
- http://www.designspark.com/blog/time-lapse-photography-with-the-raspberry-pi-camera
- https://github.com/raspberrypi/userland/blob/master/host_applications/linux/apps/raspicam/RaspiCamDocs.odt?raw=true
- http://www.adafruit.com/products/1367
Disclaimer: Images presented here are owned by their respective owners.
[post_view]
 with Python 3, OpenCV 3, Pi Camera, and Raspberry Pi 2")

