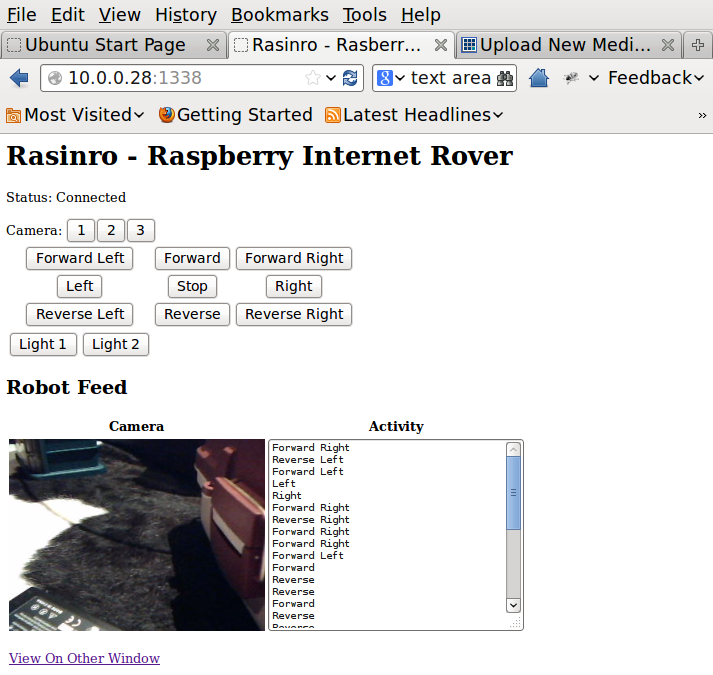
Now lets have a look on the remote control interface.
Just copy and paste the HTML script below:
<html>
<head>
<title>Rasinro – Rasberry Internet Rover</title>
</head>
<body onmousemove=””>
<h1>Rasinro – Raspberry Internet Rover</h1>
<!–
<input type=”text” autofocus=”autofocus” />
<button type=”button” id=”publish”>publish</button>
<button type=”button” id=”broadcast”>broadcast</button>
<button type=”button” id=”whisper”>whisper</button>
–>
<p>Status: <span id=”status”>Undefined</span></p>
<table>
<tr align=”center”><td><button id=’fl’ type=”button”>Forward Left</button></td>
<td><button id=’forward’ type=”button”>Forward</button></td>
<td><button id=’fr’ type=”button”>Forward Right</button></td></tr>
<tr align=”center”>
<td><button id=’left’ type=”button”>Left</button></td>
<td><button id=’stop’ type=”button”>Stop</button></td>
<td><button id=’right’ type=”button”>Right</button></td>
</tr>
<tr align=”center”>
<td><button id=’rl’ type=”button”>Reverse Left</button></td>
<td><button id=’reverse’ type=”button”>Reverse</button></td>
<td><button id=’rr’ type=”button”>Reverse Right</button></td>
</tr>
<tr>Camera: <button id=’1′ type=”button”>1</button>
<button id=’2′ type=”button”>2</button>
<button id=’3′ type=”button”>3</button>
</tr>
<tr><td><button id=’light1′ type=”button” onclick=”switch(this)”>Light 1</button>
<button id=’light2′ type=”button” onclick=”switch(this)”>Light 2</button>
</td></tr>
</table>
<script src=”/socket.io/socket.io.js”></script>
<script src=”http://10.0.0.28/mobil2an/socket.io.demo/jquery-latest.js”></script>
<script src=”http://10.0.0.28/mobil2an/socket.io.demo/coffee-script.js”></script>
<script type=”text/coffeescript”>
jQuery ($) ->
$status = $ ‘#status’
socket = io.connect()
socket.on ‘connect’, ->
$status.text ‘Connected’
socket.on ‘disconnect’, ->
$status.text ‘Disconnected’
socket.on ‘reconnecting’, (seconds) ->
$status.text “Reconnecting in #{seconds} seconds”
socket.on ‘reconnect’, ->
$status.text ‘Reconnected’
socket.on ‘reconnect_failed’, ->
$status.text ‘Failed to reconnect’
socket.on ‘publish’, (message) ->
$(‘<li>’).text(message).appendTo $(‘#messages’)
socket.on ‘secret’, (message) ->
console.log message
$input = $ ‘input’
$(‘button’).click ->
#alert (‘telek ‘ + $(this).text() + ‘ ‘ + $(this).attr(‘id’))
socket.emit $(this).attr(‘id’), $(this).text()
</script>
<p>
<h2>Video Feed</h2>
<table>
<tr>
<td> <img src=”http://10.0.0.28:8090/?action=stream” width=”320″ height=”240″>
<br><a href=”http://10.0.0.28:8090/?action=stream”>View</a></td>
<td align=”right”>Robot: <ul id=”messages” ></ul></td>
</tr>
</table>
</body>
</html>
You would also need other codes from the socket.io.demo
You can also attach a camera to view what your robot sees.
Good luck! Any question please post on comment section.
[post_view]
")
 for your Arduino project")
